


Press "Settings."
Select "Configure."
Select "Miscellaneous."
Enter the password.
Press "4" or "Reprint."
Press "Save."
When making a sale, it will first ask for the clerk ID so you can identify who processed the specific transaction on the receipt.
If you wish, for example, to print only a customer or merchant copy, here’s how to proceed:
Select "Settings."
Enter the password.
Select "Operational Settings."
Select "Receipt Option."
Select "All."
From there, you can choose No Receipt, Merchant Copy Only, Customer Copy Only, or Both.
You can select "Font Size" if you want to change the character size on the receipt.
If there are no articles addressing your question or issue, you can call Nuvei technical support at 1-866-687-3722 – options 2 and 3 for immediate assistance.
You can also write to [email protected] By specifying that the answer to your question was not on the website, so that we can update it.
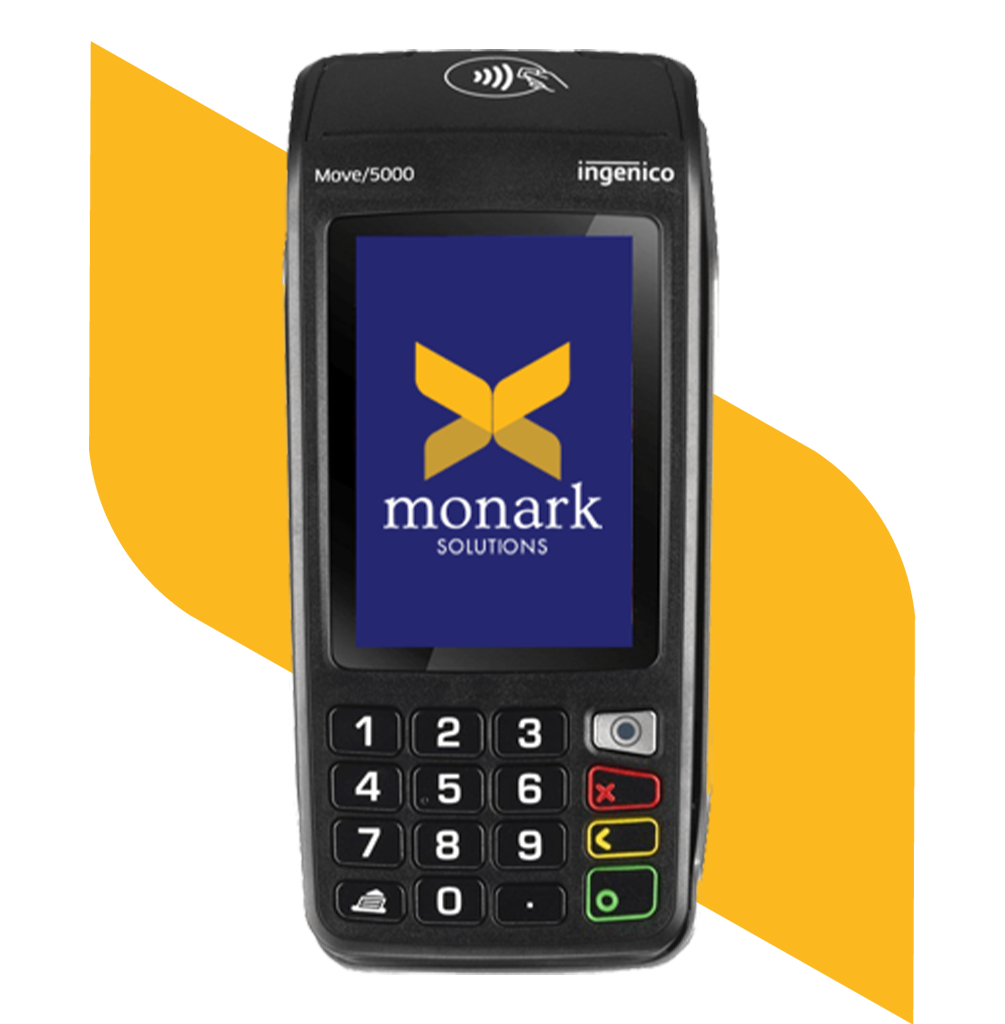
Step 1: On the PandaPay Home Screen
Press the silver button with a black circle on it.
Go to Control Panel.
Select Terminal Settings.
Choose Communication Methods.
Select Wi-Fi.
Turn ON Wi-Fi.
Scan for networks.
Select your Wi-Fi network and enter your credentials.
Step 2: Press the red button until you return to the home screen.
Press the green button.
Go to Settings.
Select Installation.
Choose Host Configuration.
Enter the terminal password and press the green button.
Select Wi-Fi.
Save the settings.
Step 3: Press the Red Button Until You Return to the Home Screen
Press the green button.
Go to Settings.
Select Installation.
SYS. Installation.
Press the green button until the communication mode screen appears.
Select Wi-Fi.
Select your Wi-Fi network and enter your credentials.
Save the settings.
1. Select MOTO or "Other" on your terminal.
2. Choose Refund.
3. Enter the card number and press OK.
4. Enter the expiration date and press OK.
5. Enter the card verification code (CVV – on the back of the card) and press OK.
6. Press OK to confirm the transaction.
From the standby screen
Press the green ENTER button.
Tap SETTINGS.
Tap CONFIGURATION.
Tap OPTIONS.
Enter the administrator password.
Press the green ENTER button.
Press the green ENTER button until the terminal reaches the BACKLIGHT screen (displayed).
Press the "Brightness" icons to increase or decrease the backlight.
Press the "Screen Saver" button to enable or disable this function.
Under SCREENSAVER TIMEOUT, tap next to MIN, then set the number of minutes before the terminal activates the screensaver.
Under SLEEP TIMEOUT, tap next to MIN, then set the number of minutes before the inactive terminal enters sleep mode.
From the standby screen
Press the green ENTER button.
Press "More."
Press "4" or "Reprint."
You can either REPRINT THE LAST RECEIPT or ENTER THE REGISTER NUMBER (specific transaction).
Press the YES button or the GREEN button.
If there are no articles addressing your question or issue, you can call Nuvei technical support at 1-866-687-3722 – options 2 and 1 for immediate assistance.
You can also write to [email protected] and mention that the answer to your question was not on the website so that we can update it!
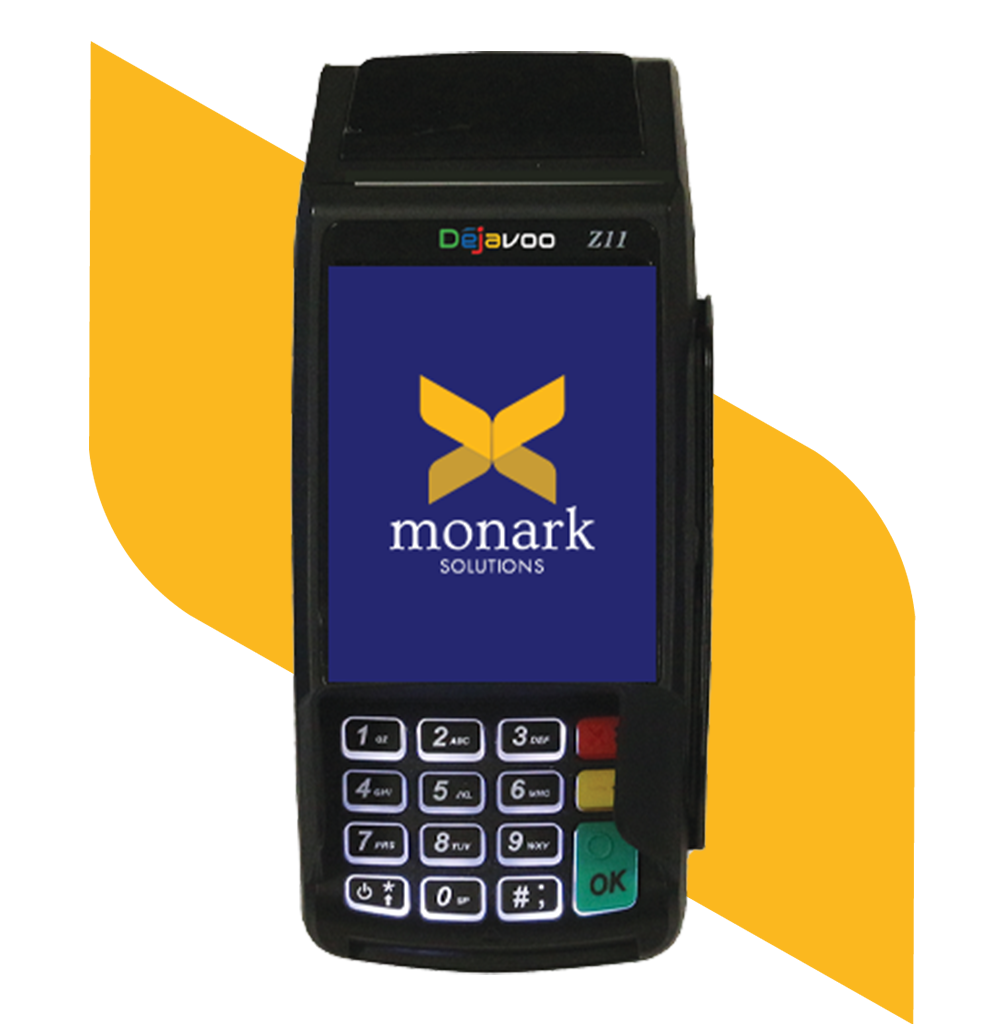
Follow the steps below to change the current password from the main menu.
From the idle screen, press the OK key to access the main menu.
Using the down arrow, highlight UTILITY and press OK.
* Si vous êtes invité à saisir un mot de passe, entrez le mot de passe par défaut.
Using the down arrow, highlight SECURITY and press OK.
Using the down arrow, highlight CHANGE PASSWORD and press OK.
Using the down arrow, highlight a security question to configure and press OK.
This will only appear the first time the password is changed from factory defaults.
Use the alphanumeric keyboard to set your answer to the selected security question. Press the green OK key to confirm your answer.
Use the keyboard to enter the current terminal password you wish to change. Press the green OK key to confirm.
If this is the first time enter the default password.
Use the keyboard to enter the NEW customized password you want to set. Press the green OK key to confirm.
Use the keyboard to re-enter the NEW customized password for confirmation. Press the green OK key.
The terminal flashes the new confirmed password and returns to the main security menu ('STOP').
For manual entry, follow the instructions below:
1. Manually enter the card number from the front of the card and press OK.
2. Manually enter the card number from the front of the card and press OK.
3. The terminal will display EXP date (MMYY). Enter the expiration date from the front of the card and press OK.
4. Press F2 to select YES if the card is present, or press F4 to select NO if the card is not present.
Note: If the card is not present, follow the instructions to enter the AVS and the card security code information.
The terminal communicates with the host. The terminal displays the host response (e.g., Approved or Declined) and prints the sales receipts.
The terminal returns to the idle screen (“STOP”).
Follow the steps below to connect your terminal to your Wi-Fi network:
1. From the idle prompt, press the GREEN key to access the main menu.
Press #4 for UTILITY * If you are prompted to enter a password, enter the default password.
3. Press #3 for COMMUNICATIONS.
4. Press #2 for LOCAL PARMS.
5. Press #3 for Wi-Fi.
6. Press #1 for SCAN NETWORK *A list of available networks will be displayed.
7. Locate the network name in the list of available networks and tap on the network name to select it.
8. Press #2 for CONFIGURE.
9. Press #1 for SET PASSWORD.
10. Use the alphanumeric keypad to enter the password for your WPA2 network key (PASSWORD).
Press the green button when finished.
Note
The Wi-Fi network must support WPA2 security.
The Wi-Fi router must support a minimum speed of 2.4 GHz.
The Wi-Fi network name should not contain special characters (-@#! etc.).
From the standby screen
Press the green ENTER button.
Tap MORE.
Press 4 or REPRINT.
You can either REPRINT THE LAST RECEIPT or ENTER THE REGISTER NUMBER (specific transaction).
Press the YES button or the GREEN button.
If there are no articles addressing your question or issue, you can call Nuvei technical support at 1-866-687-3722 – options 2 and 1 for immediate assistance.
You can also write to [email protected] and mention that the answer to your question was not on the website so that we can update it!

If your terminal is damaged and needs to be replaced, please contact Jean-Philippe Coderre at the following address: [email protected]
For any payment terminal returns, you must contact Jean-Philippe Coderre to receive instructions at the following email address: [email protected]


When managing your business finances, understanding how card processing fees are billed can impact your cash flow. At PandaPay, we offer two billing options: daily billing and monthly billing. Here’s an overview of each and how they can benefit your business.
What is Daily Billing?
With daily billing, a portion of your card processing fees is deducted each day, directly based on your transaction volume. This means your fees are spread out over the month instead of being charged in one large monthly payment.
Benefits of Daily Billing:
Better Cash Flow Management: Since fees are deducted daily, there’s no large end-of-month charge, allowing you to manage your finances more evenly.
Simplified Reconciliation: Daily deductions make it easier to match transactions with fees, simplifying your month-end reconciliation.
What is Monthly Billing?
Monthly billing means that the total card processing fees for the entire month are deducted in a single payment, usually at the beginning of the following month. This is a common choice for businesses that prefer a single, consolidated fee payment.
Benefits of Monthly Billing:
Single Monthly Deduction: You receive one clear statement for all fees, which can be easier to track for some businesses.
More Available Cash Daily: Since fees aren’t deducted daily, you retain more working capital throughout the month.
Which Option is Best for Your Business?
If you want to avoid a large deduction at the beginning of the month, switching to daily billing could be beneficial. However, if you prefer a predictable, consolidated monthly payment, monthly billing might be the better option.
If you need help selecting the best billing option, feel free to contact our team for assistance.
Merchant statements are documents you receive each month. They provide a detailed breakdown of all customer transactions processed over a 30-day period, along with any fees charged for these transactions.
The statement typically includes a deposit summary, which outlines all fees for each party involved in the transactions.
This section outlines additional rates and fees that may be charged to a merchant for payment processing services.
Monark Solutions veille à ce que ces frais soient clairs et transparents – voir l’exemple ci-dessous.
Monthly Statement Fee - Covers part of the administrative costs to keep an account open, including support staff and software maintenance.
TMP (Warranty) – Covers the cost of a replacement terminal in case of defects or software issues that cannot be resolved through technical support.
Quarterly Data Security Fee – PCI compliance fee (billed quarterly).
Equipment Rental Fee – Monthly cost for leased payment processing equipment.
Interac Flash Interchange – Covers processing costs, fraud, and risk related to payment approval, paid directly to the issuing bank (billed for transactions from previous months).
GST/HST and QST – Taxes applied to all purchases, as well as certain additional fees such as application, anniversary, and PCI compliance fees.
Interac Flash Interchange Fee Interchange fees associated with Interac FLASH (contactless) transactions from previous months.
Mastercard Transmission & MC Service Fees – Part of regulated interchange fees that go directly to Mastercard for settlement and service charges.
Interac Debit Transaction Fee – A regulated interchange fee that goes directly to financial institutions to support the costs and benefits of providing Interac services to customers.
Authorization Fee – Covers the cost of authorization granted by the issuer to financial institutions for accepting card payments.
Batch Fee – Charged for processing settlements or batch closures.
Interac Network Assessment Fee – A regulated interchange fee that goes directly to financial institutions to support the costs and benefits of providing Interac services to customers.
This section includes the different types of cards your customers have used over the past 30 days..
It is broken down into columns:
Card Type – Groups all standard cards into an easy-to-view list.
Number of Sales – The total number of transactions processed for each card type.
Sales – The total sales amount for each listed card category.
Number of Credits – The total number of refunds processed for each card category.
Credits – The total amount of refunds processed.
Total Items – The total number of transactions processed, including sales and refunds.
Net Sales – The total net sales amount for each card category (sales minus refunds).
Average Ticket – The average sale amount across all transactions for the month.
Discount Per Item – Not applicable to PandaPay merchants.
Disc % – The percentage rate charged for processing credit card transactions.
Discount Due – The total amount charged for processing credit card transactions, categorized by card type.
This summary is located on the first page of our/your statement.
It provides the total number of settlements or batch amounts processed, along with the dates, number of sales, sales amount, and credits for each previous month.
There are two main cost components to analyze in your merchant processing statement:
• Wholesale or Base Cost – These consist of interchange fees and assessments. Interchange fees are charged by banks to process each transaction. They vary depending on the card brand. Assessments are the fees paid to the card-issuing companies themselves. These costs are fixed amounts that cannot be negotiated.
• Markup – Any fees exceeding your wholesale or base cost constitute your markup. This is what is paid to your payment processor. This component can be negotiated.
Your payment processor may include the percentage charged for these components on your merchant processing statement. This makes it easy to see how much in fees you pay each month. PandaPay ensures this is simple and transparent.
Step 1: Identify Important Information
The first step in reading your merchant processing statement is to review the document to identify important information.
Generally, in the top right corner, you will find the name and contact details of your processor. Below that, you should see your business name and information.
On the left side, you will typically see the processing month, your Merchant Identification Number (MID), and your secure banking information for deposits.
Below this, you should see the summary. This section usually includes the number of sales processed for each card brand and the interchange fees associated with transactions.
Step 2: Determine the Pricing Model Used
The type of pricing model you have depends on your merchant processor:
Membership or Subscription : This is a newer model where the margin is charged as a monthly subscription fee. There are also separate per-transaction fees, which are beneficial if you have larger transactions.
Flat Rate : All transactions will have the same cost, including the wholesale cost. This usually results in high transaction fees, especially for debit transactions.
Interchange-Plus : Both wholesale and markup fees are listed, making this the easiest pricing model to understand, even though reviewing a merchant services statement may take longer.
Tiered Pricing This model categorizes all your transactions into qualified, mid-qualified, and non-qualified transactions. You receive the lowest rates for your qualified transactions and the highest rates for your non-qualified transactions.
Step 3: Establish the Discount Method
A processor will use either daily or monthly discounting to deduct fees from your account. The discounting method used affects your total fees, and this is something you determine. Monthly discounting tends to be better suited for most businesses, but here’s a breakdown of both:
Daily Discounting : The term "less discount paid" is usually how you can identify this method. The processor will charge its qualified rate before settlement and will charge transaction fees and other fees at the end of the month. The daily discount report will contain the fees paid during the month as well as those charged at the end of the month to calculate the total expenses.
Monthly Discounting : Each fee is charged as a lump sum at the end of the month. This method is much easier to track on a statement.
Step 4: Calculate Your Processing Fees
You are now ready to identify your processing fees. You can take the total fees charged and subtract your interchange fees (your wholesale/base costs). The remaining amount is the markup that your credit card processor charges.
Step 5: Analyze Costs and Compare with Other Processors
Below, we can see how processing fees differ based on the card brand and card level.
Additionally, you can also see the "batch fees". A batch refers to the total dollar value of transactions processed within a business day, which will be transferred to the merchant’s business checking account. Batch fees are the processing fees for that transfer.

The Merchant Dashboard on PandaPay Live is like a command center for merchants in the digital commerce space. It is an online platform where merchants can seamlessly access crucial information tailored to their business needs.
From monthly statements to detailed batch reports and deposit summaries, the Merchant Dashboard provides a comprehensive view of their financial landscape.
With just a few clicks, merchants can browse their transaction history, monitor sales trends, and stay informed about their account activity, enabling them to make informed decisions and manage their business with ease.
In your Merchant Dashboard, you can view all issues in the disputes section. This is where you can find the history and status of various types of issues affecting your business.
You can set up notifications for each user via email, SMS, or inbox in the **MANAGE USER** section by clicking on the Settings icon under the selected user.
Once logged into your Merchant Dashboard:
1. Click on your name in the top corner and select Manage Users.
2. Click on ADD A NEW USER and enter their first name, last name, and email address.
3. Choose USER as the ACCOUNT ROLE, then select the merchant account you want to grant them access to.
4. At the bottom of the screen, you will see a section where you can choose the user's permissions.
On the left side, click on the section titled "Statements". From there, you can view or download any statement in English or French since your enrollment with PandaPay, for all your MIDs.
If you have trouble understanding your statement, you can email [email protected] for assistance.

When managing your business finances, understanding how card processing fees are billed can impact your cash flow. At PandaPay, we offer two billing options: daily billing and monthly billing. Here’s an overview of each and how they can benefit your business.
What is Daily Billing?
With daily billing, a portion of your card processing fees is deducted each day, directly based on your transaction volume. This means your fees are spread out over the month instead of being charged in one large monthly payment.
Benefits of Daily Billing:
Better Cash Flow Management: Since fees are deducted daily, there’s no large end-of-month charge, allowing you to manage your finances more evenly.
Simplified Reconciliation: Daily deductions make it easier to match transactions with fees, simplifying your month-end reconciliation.
What is Monthly Billing?
Monthly billing means that the total card processing fees for the entire month are deducted in a single payment, usually at the beginning of the following month. This is a common choice for businesses that prefer a single, consolidated fee payment.
Benefits of Monthly Billing:
Single Monthly Deduction: You receive one clear statement for all fees, which can be easier to track for some businesses.
More Available Cash Daily: Since fees aren’t deducted daily, you retain more working capital throughout the month.
Which Option is Best for Your Business?
If you want to avoid a large deduction at the beginning of the month, switching to daily billing could be beneficial. However, if you prefer a predictable, consolidated monthly payment, monthly billing might be the better option.
If you need help selecting the best billing option, feel free to contact our team for assistance.
Merchant statements are documents you receive each month. They provide a detailed breakdown of all customer transactions processed over a 30-day period, along with any fees charged for these transactions.
The statement typically includes a deposit summary, which outlines all fees for each party involved in the transactions.
This section outlines additional rates and fees that may be charged to a merchant for payment processing services.
Monark Solutions veille à ce que ces frais soient clairs et transparents – voir l’exemple ci-dessous.
Monthly Statement Fee - Covers part of the administrative costs to keep an account open, including support staff and software maintenance.
TMP (Warranty) – Covers the cost of a replacement terminal in case of defects or software issues that cannot be resolved through technical support.
Quarterly Data Security Fee – PCI compliance fee (billed quarterly).
Equipment Rental Fee – Monthly cost for leased payment processing equipment.
Interac Flash Interchange – Covers processing costs, fraud, and risk related to payment approval, paid directly to the issuing bank (billed for transactions from previous months).
GST/HST and QST – Taxes applied to all purchases, as well as certain additional fees such as application, anniversary, and PCI compliance fees.
Interac Flash Interchange Fee Interchange fees associated with Interac FLASH (contactless) transactions from previous months.
Mastercard Transmission & MC Service Fees – Part of regulated interchange fees that go directly to Mastercard for settlement and service charges.
Interac Debit Transaction Fee – A regulated interchange fee that goes directly to financial institutions to support the costs and benefits of providing Interac services to customers.
Authorization Fee – Covers the cost of authorization granted by the issuer to financial institutions for accepting card payments.
Batch Fee – Charged for processing settlements or batch closures.
Interac Network Assessment Fee – A regulated interchange fee that goes directly to financial institutions to support the costs and benefits of providing Interac services to customers.
This section includes the different types of cards your customers have used over the past 30 days..
It is broken down into columns:
Card Type – Groups all standard cards into an easy-to-view list.
Number of Sales – The total number of transactions processed for each card type.
Sales – The total sales amount for each listed card category.
Number of Credits – The total number of refunds processed for each card category.
Credits – The total amount of refunds processed.
Total Items – The total number of transactions processed, including sales and refunds.
Net Sales – The total net sales amount for each card category (sales minus refunds).
Average Ticket – The average sale amount across all transactions for the month.
Discount Per Item – Not applicable to PandaPay merchants.
Disc % – The percentage rate charged for processing credit card transactions.
Discount Due – The total amount charged for processing credit card transactions, categorized by card type.
This summary is located on the first page of our/your statement.
It provides the total number of settlements or batch amounts processed, along with the dates, number of sales, sales amount, and credits for each previous month.
There are two main cost components to analyze in your merchant processing statement:
• Wholesale or Base Cost – These consist of interchange fees and assessments. Interchange fees are charged by banks to process each transaction. They vary depending on the card brand. Assessments are the fees paid to the card-issuing companies themselves. These costs are fixed amounts that cannot be negotiated.
• Markup – Any fees exceeding your wholesale or base cost constitute your markup. This is what is paid to your payment processor. This component can be negotiated.
Your payment processor may include the percentage charged for these components on your merchant processing statement. This makes it easy to see how much in fees you pay each month. PandaPay ensures this is simple and transparent.
Step 1: Identify Important Information
The first step in reading your merchant processing statement is to review the document to identify important information.
Generally, in the top right corner, you will find the name and contact details of your processor. Below that, you should see your business name and information.
On the left side, you will typically see the processing month, your Merchant Identification Number (MID), and your secure banking information for deposits.
Below this, you should see the summary. This section usually includes the number of sales processed for each card brand and the interchange fees associated with transactions.
Step 2: Determine the Pricing Model Used
The type of pricing model you have depends on your merchant processor:
Membership or Subscription : This is a newer model where the margin is charged as a monthly subscription fee. There are also separate per-transaction fees, which are beneficial if you have larger transactions.
Flat Rate : All transactions will have the same cost, including the wholesale cost. This usually results in high transaction fees, especially for debit transactions.
Interchange-Plus : Both wholesale and markup fees are listed, making this the easiest pricing model to understand, even though reviewing a merchant services statement may take longer.
Tiered Pricing This model categorizes all your transactions into qualified, mid-qualified, and non-qualified transactions. You receive the lowest rates for your qualified transactions and the highest rates for your non-qualified transactions.
Step 3: Establish the Discount Method
A processor will use either daily or monthly discounting to deduct fees from your account. The discounting method used affects your total fees, and this is something you determine. Monthly discounting tends to be better suited for most businesses, but here’s a breakdown of both:
Daily Discounting : The term "less discount paid" is usually how you can identify this method. The processor will charge its qualified rate before settlement and will charge transaction fees and other fees at the end of the month. The daily discount report will contain the fees paid during the month as well as those charged at the end of the month to calculate the total expenses.
Monthly Discounting : Each fee is charged as a lump sum at the end of the month. This method is much easier to track on a statement.
Step 4: Calculate Your Processing Fees
You are now ready to identify your processing fees. You can take the total fees charged and subtract your interchange fees (your wholesale/base costs). The remaining amount is the markup that your credit card processor charges.
Step 5: Analyze Costs and Compare with Other Processors
Below, we can see how processing fees differ based on the card brand and card level.
Additionally, you can also see the "batch fees". A batch refers to the total dollar value of transactions processed within a business day, which will be transferred to the merchant’s business checking account. Batch fees are the processing fees for that transfer.
Didn't find the answer to your questions? Write to us, and we’ll be happy to assist you.